Very crafty

Dressed up dresser: DIY

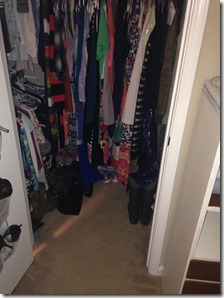
I have a lot of stuff. Like…a whole lot. I also have a small dresser and a small walk-in closet. Therefore, for the past few years, I’ve had overflowing dresser drawers and a closet stuffed to max capacity.

closet

I mean, seriously. And this is after doing a big clean out within the last six months.

I had been thinking for a while about getting a second dresser. After looking anywhere and everywhere I could think of, I realized that I didn’t particularly like anything I could afford.

It doesn’t help that I’m picky. I very specifically wanted something with cabinet space for towels and sheets since I don’t have a linen closet. I also wanted drawers on the bottom, not just shelves or another cabinet. And high-quality armoires aren’t cheap, y’all.

Anyways, after watching a few of pinksofoxy’s DIY videos on YouTube, along with the furniture makeover vid from What’s Up Moms, I decided to give the upcycling thing a try.

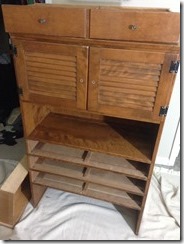
I got insanely lucky and found exactly what I wanted the very first time I went to Goodwill to look for a dresser. Seriously, cabinet on top, three drawers, solid wood and made by Ethan Allen. I got it for about $40.

dresser original

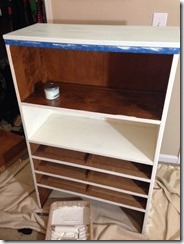
To start, I took off all the hardware and removed the doors and drawers. I spent an additional $50 at Lowe’s on sandpaper, paint, primer, a roller, foam brush, mineral spirits and a paintbrush. I bought wayyyyyy too much paint, so that total could have been $10-$15 lower. I also bought really cute new knobs for the cabinet doors on sale at a craft store for $3.

Then, I sanded the entire piece, including the doors and drawers. After I sanded each part, I wiped it down with mineral spirits and an old, soft rag to make sure it was completely dust free. Then, I primed everything. I thought I might be okay with using a paint and primer in one (I wasn’t), but after trial and error, I highly recommend using a real primer solo first.

dresser prime

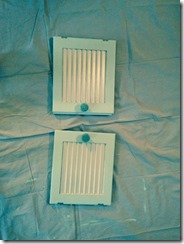
Once the primer dried overnight, I got to start painting! I did three light coats, and used Milk Paint by Olympic as the white base and Belle Grove Sorbet by Valspar for the minty green drawers and accents. I painted the original drawer hardware the same color as the drawers to make them really unobtrusive.

dresser paintdresser doors

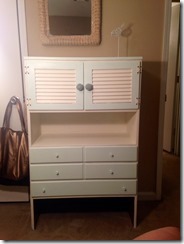
Then, I reattached all the hardware and screwed the hinges back onto the cabinet. I let the paint cure for one more night to give it a full 48 hours before setting anything on it, and then started filling it up with my stuff! I don’t have anywhere really safe to clear-coat and seal it right now, but I’ll probably touch it up and seal it whenever I move or get access to a safe place to polyurethane.

dresser finished

I’m planning to get some canvas bins for underneath to house my running tops, so that I can really maximize my space. For under $100, I was able to get a customized dresser that is exactly what I wanted. It fits so perfectly with my room and the space I have.

The dangerous thing is that now I have 7,000 ideas for what I want to upcycle next. Any brilliant projects to recommend?
Very crafty

Decorating is hard for the undomesticated

I moved into my apartment last January, and just resigned my lease for another year. I’ve been meaning to decorate oh…since I moved in. Hasn’t happened yet.

I have friends whose houses look impeccable. Everything goes together, the pictures and artwork are framed and hung, and they have liners in their kitchen cabinets. Not I. My apartment is a mishmash of free furniture and sale finds. I have ideas to make it all come together, but my undomestic side tends to get in the way.

However, a few weeks ago, I got creative with a girlfriend and recreated a few things I saw on Pinterest. It’s a start right?

20130919-095115.jpg

I saw this little gem done with another state (Ohio, maybe? Geography isn’t my strength), and I knew I wanted to do a Georgia version. It’s pretty simple. I think the whole project cost me about $7. Here’s the original link: http://theharpsterhome.wordpress.com/2011/12/12/heart-in-ohio/.

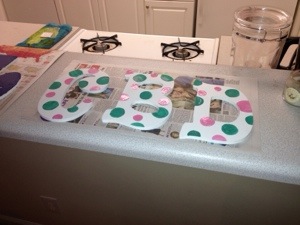
Next, I decided to make a monogram for my bedroom. The joke is that if monogram my forehead if I could. I painted some letters from Hobby Lobby with polka dots. Again, less than $10 for the whole project. Super simple. I still need to hang them though…

20130919-095618.jpg

I have plans for a few more projects, like the afghan I’m crocheting, actually putting together a dining area at my kitchen bar, and getting a picture wall together. Maybe it won’t take 9 months this time.

Very crafty

Pinterest obsessed

I’m baaaaaaack! It’s been forever and ever since I’ve blogged. Life got crazy. I moved. I’ve been trying to balance work and a social life. I still don’t have my internet set up at home (yes, I’m in the dark ages here). But honestly, a lot of it comes from the fact that I felt uninspired to write. Blogging was becoming a chore instead of something I really wanted to do.

Recently though, I’ve had all kinds of blog ideas pop into my head. So I decided it was time to write again. Which means you, my awesome readers, are still stuck with me!

Anywhos, now that I’ve offered a not-so-heartfelt apology excuse for my absence, let’s get into the fun stuff, shall we?

On Saturday, I decided it was time to stop obsessing over everything I saw on Pinterest and actually do some of the stuff. I hit up Hobby Lobby (Heaven on Earth) with my mom, and started spending money.

But first, I had to take a shameless selfie in the bathroom mirror to show everyone that, on occasion, I can actually put together an outfit beyond Nike shorts and a t-shirt. Pardon the crazy-intense face I’m making. And the stork pose. I needed you to see my shoes.

shameless selfie

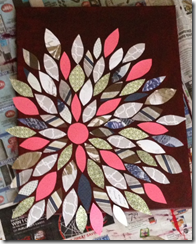
Out of the three crafts I tried, two have turned out fairly nicely, and one I’m going to redo now that I have a better idea of what I want. The one I’m going to detail today, though, is from itsdoable.squarespace.com. It’s definitely my favorite, even if it’s the most labor intensive out of the bunch.

Here’s a side-by-side of the inspiration and my execution. I’m pretty sure you can guess which is which.

inspirationflowerunglued

Mixed media wall art

Materials:

  • A blank canvas (I used a 16”x20”)
  • Acrylic paint in whatever background color you want
  • 5 sheets scrapbook paper in different prints
  • Scissors
  • Hot glue gun

Instructions:

  1. Mix together paints to form desired background color. I went with a wine-y plum/red. Make sure to mix enough to cover the whole canvas, including the sides.
  2. Paint the entire canvas. Don’t forget the corners and edges. Let the canvas dry overnight.
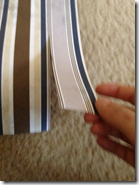
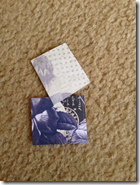
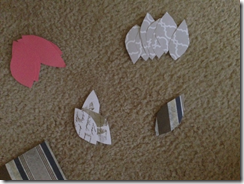
  3. Begin cutting your scrapbook paper. Start by cutting the paper into 2”-3” strips. Eyeball it; it’s not important to be perfect here. Then cut the strips into 5 or 6 squares. Take each square and cut a curved line from corner to corner—cut another curved line from the same corner to the same corner to make your leaves. Also cut a circle to serve as your starting point.
  4. Place your circle somewhere off-center on your canvas. I went with the lower left corner, but other placements would look cool, too. Start building your flower using the scrapbook paper leaves. I started with the smaller leaves and built outward, ending with larger leaves. Throughout the process, I had to trim down pieces to make them fit how I wanted them to. It’s kind of a like a jigsaw puzzle.
  5. Now for the fun part: starting outwards and working your way back in, hot glue each piece to your canvas. This is time-consuming and labor-intensive. Make sure to wrap your leaves on the edge around the canvas. This makes it look nice and finished. Let the canvas dry. I chose overnight, just to be safe.
  6. Hang your new art up! Mine’s going in my living room as soon as I remember to buy some nails.

Here’s some side-by-sides of the leaf cutting.

cutting stripsscrapbook squaresMaking leavesleaves

This whole project took me less than four hours and cost less than $15. For a girl on a budget, you can’t beat that! I’m not always the most creative person, so if I can do it, anyone can. Seriously. I’ve also gotten a ton of compliments on it from everyone who’s seen it. Just have fun with it!

Have you tried any Pinterest projects?

I pin a kajillion things and say I’ll try them, but I think this is the first pin I’ve actually replicated.

Any homemade crafts on display at your abode? What are they?

This is the first one! Like I said, I just moved and I barely have any furniture, so I’m getting to decorate and accessorize a little at a time.

Very crafty

Halloween Wreath Tutorial

I love decorating for different holidays throughout the year, but my budget unfortunately limits how much decorating I can do. When I’m low on cash, splurging on making my house look like a holiday heaven just seems too frivolous.

However, I’ve recently been exploring my crafty side, and I decided to try my hand at decorating a door wreath for Halloween. I’m no Martha Stuart, but I really liked the end results. Plus, the whole project only cost $15 whereas a a decorated wreath from Ms. Stuart retails for over $40.

I got all of my crafty goods from Michael’s. I used two different kinds of 2” wide ribbon, an 18” twig wreath, thin-gauge wire, and fake cobwebs for this project.

ribbon roses

I started by making these cute ribbon roses. I’ve been making them since the 4th grade, so it was nice to be able to use the skill for a project finally! I found a great tutorial on how to make these here.

By varying the lengths of ribbon from 1 yard to 3 yards, I created roses of different sizes and thicknesses. When I finished each rose, I then wrapped wire at the base of the ribbon rose to secure it, and left a long tail on each rose.

wire stem

Like so. You want to tightly wrap the wire at the base of the rose, and you’ll also want to be sure to leave a long enough “tail”. You’re going to use the wire tails to secure the ribbon roses to the wreath.

wreath start

I laid out the roses first to see where I wanted to secure them, then fastened them all on. Once they were secured to the wreath, I trimmed any ribbon tails hanging down from the roses.

wreath no web

Here’s the wreath with all the roses on.

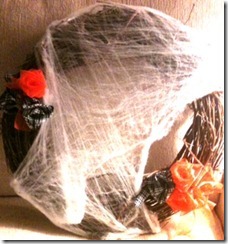
As pretty as that looks, it was a little simple and not Halloween-y enough for me, so I stretched fake cobwebs across the wreath.

wreath

Here’s the end result. The wreath took me under an hour from start to finish, and the wreath can be stripped and used again for other holidays. I love that it’s not a “spooky” wreath, and I really like the simplicity of it.

Or maybe my love of all things simple speaks to a real desire to not have to make too much effort.

Anyways, for $15 I now have a cute wreath to hang on our front door, and enough left over cobwebs to decorate a few windows. I’m thrilled to actually have a house that looks like someone tried.

You know, because trying is something successful people do, right? Maybe I should try more…

Very crafty

Do these knitting needles make me look more mature?

I’ve always been a person to start a project with tons of gusto, only to run out of steam after a few attempts. I’ve tried knitting countless times, always to knit a few rows then stop.

However, over the weekend, I ran into a super easy knitting project to get me started, and I finished it (almost) all by myself!

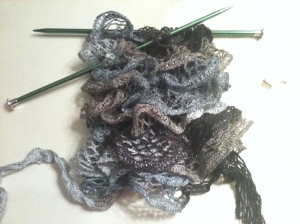
The project is a ruffle scarf. I got the yarn, needles, and pattern from Michael’s, and I followed this tutorial from Red Heart. The project uses their Sashay yarn.

The hardest part for me was getting started. It’s not quite like normal knitting, because the yarn is so different. This is where the tutorial really helped me out. I chose to use 10 stitches versus 6 stitches for a slightly wider scarf.

Once you get the hang of knitting with the yarn, this project goes super fast. I think I finished in about 4 hours total. And I was not knitting anywhere close to fast.

Here’s the finished, ruffly caterpillar. However, I decided to go one step further and make mine an infinity scarf. Since I’m sooooo trendy and all. I simply sewed the two ends together and ended up with this:

The scarf is actually really thick, so it’ll be great for winter weather.

Here’s me, all ready for fall to get here!

The best part of this project was the whole thing, including buying knitting needles, cost me under $10. I highly doubt I could buy a high-quality infinity ruffle scarf for less than that. Plus, I got to pick my colors, my width, and have the satisfaction of doing it myself.

Oh, lordy, I just sounded like my mother.

What are some of your favorite craft projects?